As an Amazon Associate, I earn from qualifying purchases with no additional costs for you.
Some people like fossils the way they are, while others like to make them shiny or polish them for reselling value or other aesthetic purposes. No matter the case, if you want to make your fossils shiny, there are a couple of ways to do so. However, everything matters. From the moment you collect your fossils, how you transport and clean them.
To make your fossils shiny, clean them with a toothbrush and water. Someone uses a thin coat of varnish when working with calcitic ammonites to brighten them up and use a kitchen towel or lint-free cloth to make them shiny.
Certain fossils need a bit of their matrix for support, but removing excess matrix isn’t an issue as long as you don’t overdo it. No matter what type of shining or polishing technique you may use, it’s best to test it on an already compromised piece before moving on to your complete fossil.
Here is everything you need to know about making your fossils shiny the right way, cleaning, and some polishing tips!
If you want to check out the best Dremel drills you can find them by clicking here (Amazon link).
What Do You Use to Polish Fossils?
When polishing your fossils, use sandpaper, medium, or fine grit. It all depends on your fossil type and what polish you want to achieve. You will also need soft or dry bruises, cleaning cloths, and varnish.
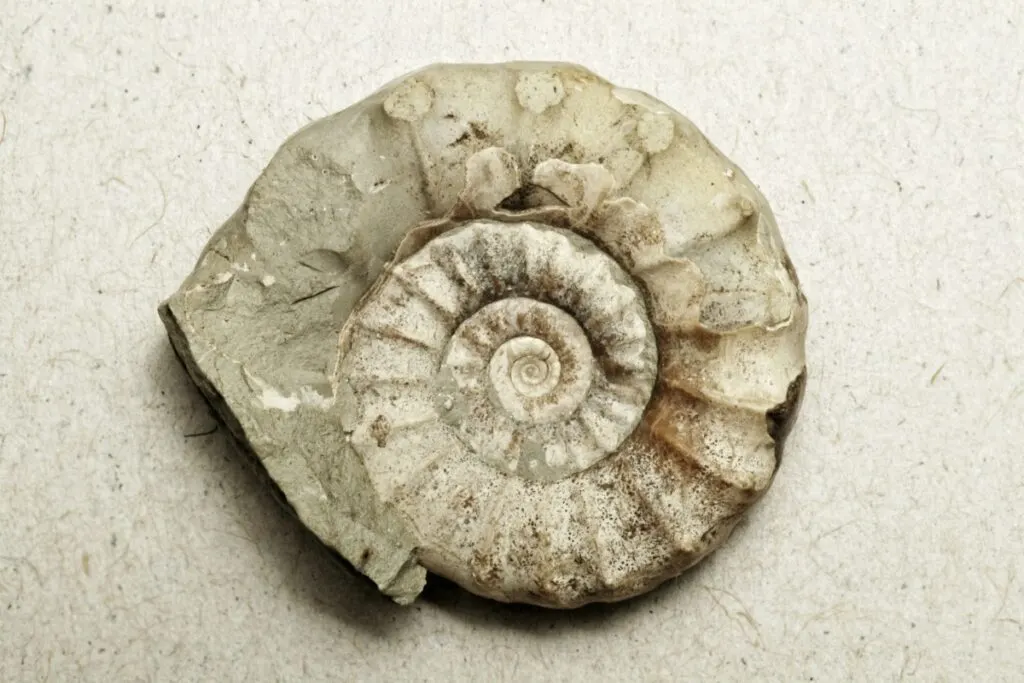
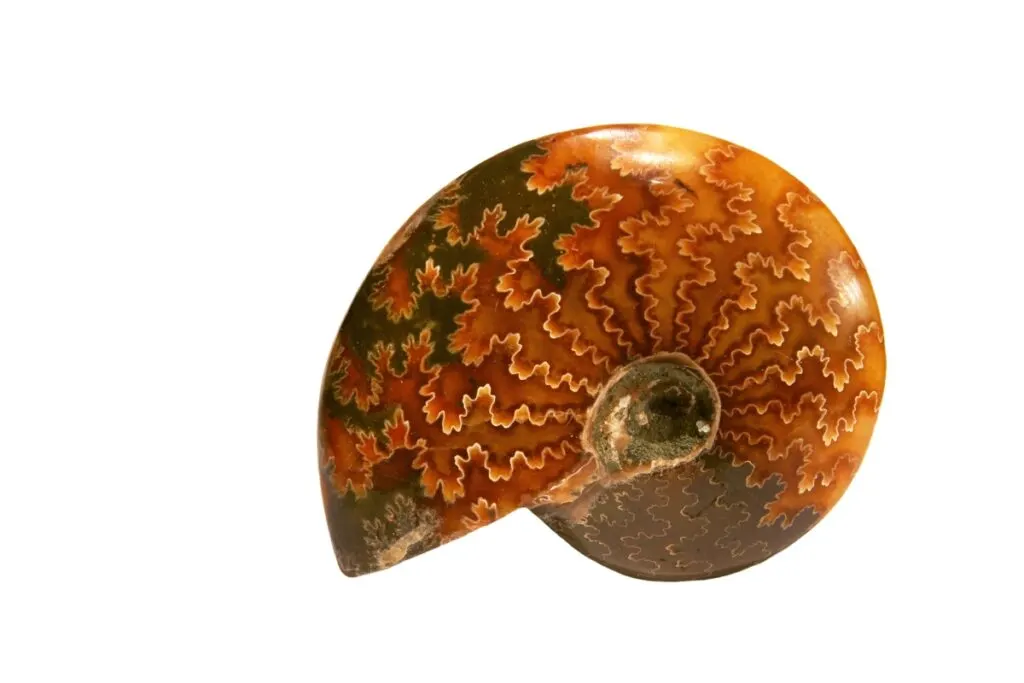
Ammonite fossils work great with soft brushes and 600-grit sandpaper, 1,500-finer grit sandpaper for further polishing, and a polishing cloth to give it a shiny texture.
Regarding aquatic fossils, the 800-grit or higher sandpapers are the best to remove impurities. Opalescent fossils work well with Dremel tools and soapy water.
In general, visual appeal is what you want to achieve in your fossil polishing process, and the more details are visible, the better. Some surfaces of your fossils can easily chip away, but if you choose to polish them, you ensure their protection and a smooth surface that will be easier to clean.
Various types of abrasive papers, such as sandpaper, are used to remove scratches, depressions, or high areas from the surface of your fossil.
To achieve the best results, start with course 100-grit wet and dry sandpaper and move up to 1,200-grit sandpaper or higher. Use circular motions, rub between five to ten minutes, and keep sanding as seen in this video:
While using the 100-grit sandpaper, you will already know what details you want to keep before moving to higher-grit sandpaper. Use hot water with your sandpaper and a sanding block. Attach the sandpaper to it and even the fossil surfaces while maintaining the paper wet and rinsing regularly.
Use water to get rid of dirt or grit, and use finer sandpaper grits to remove scratches made during the initial leveling process. With a 200-grit, you can quickly eliminate the roughness you created with the 100-grit.
Repeat the sanding process, then switch to the 400-grit sandpaper, 800, and 1,200. You can go higher if you believe it’s necessary. Everything you switch to another grit level, you always have to ensure that the scratches from the previous grits are removed.
Once you are done with the grit, your fossil is ready for polishing, and there are various methods of doing so depending on what specimen you have and its condition. In most cases, you can create your own polish or buy varnish.
You will need water and a teaspoon of aluminum oxide polishing compound to create your polish. You will make a paste to apply to a leather pad and then use it on the fossil until you reach a shiny appearance.
Once you are done, rewash the fossil in water and dry it off. You can use a lint-free cloth to dry off your fossils and get them ready for display.
You can also use other products for polishing your fossils, such as vinegar, olive oil, metal polish, mineral oil, beeswax, carnauba, baking soda, or even toothpaste.
TIP: Getting from raw rock to polished stone is daunting, but if you follow this process, you’re bound to get a specimen you’re proud of. Check out the guide in the article below:
How to Polish Rocks With a Dremel Drill? Follow These 4 Steps
Can You Polish Fossils With a Rock Tumbler?
Although the best and safest way to polish fossils is by hand, you can do so with other tools, such as a rock tumbler. However, many fossils are fragile and don’t work well with a tumbler.
You must choose the proper fossils for your rock tumbler and grit to achieve good results. The best fossils to tumble are those with a hardness similar to agate, and some fossils are composed of the same minerals, so you shouldn’t have any problems tumbling these types of fossils. Thus, the matrix surrounding the fossil is critical.
You can use a rotary tumble for fossils in the first stage of polishing. You will need 60/90 ungraded grit and let the fossils tumble between 18 and 21 days.
In the second stage, you will need a vibratory tumbler and 400 or 600 grit for 3 or 4 days. In the last stage, apply cerium oxide polish for three or four more days.
Some great fossil examples that can be polished with a rock tumbler include agatized fossils, such as crinoids, brachiopods, bryozoans, gastropods, and various other types of corals and agate fossils.
However, additional precautions might exist depending on which specimen you wish to try the three-step procedure mentioned earlier. Still, nonetheless, you can use a rock tumbler to polish fossils.
Can You Polish Fossils With a Dremel?
Apart from tools such as a rock tumbler, you can also use a dremel to polish your fossils. A dremel is a small rotating grinding wheel that you can use to sand and polish your fossils; however, not all fossils can be polished with a dremel.
A dremel works best in polishing hard and giant fossils; you shouldn’t use it on delicate or small fossils. Opalescent fossils, for example, can be polished with a dremel machine, but it all depends on their size and shape. You can also use a dremel to polish your petrified wood specimens easily.
TIP: Our choice for polishing fossils or rocks is the Dremel 4300-5/40 kit (Amazon link) manufactured by Dremel. This tool is perfect for polishing fossils, stones, and minerals.
Just attach the sanding to your dremel and use circular motions on your fossils using a low grit sandpaper until you reach the finer grits. You can finish the sanding procedure with a felt polishing wheel to make your fossils shine or apply mineral oil or beeswax to protect your specimen further.
How Do You Clean Fossils?
Cleaning your fossils is one of the most important steps before moving on to the polishing procedure and achieving that shiny look. The cleaning procedures might vary depending on what type of fossil you have.
For example, shell fossil specimens can be washed with hot water and a small detergent. You will also need a soft brush.
If you have oil-stained fossils, you can use bleach or gasoline to remove the stains, but generally, don’t use these chemicals on non-petroleum-rich shale or soil-collected specimens. Vinegar is also a great way to clean fossils.
In some cases, such as with ammonite specimens, you must leave them in white vinegar for several hours or overnight to clean them.
You can rinse the sample with warm water, place it in a bowl with baking soda and leave it again overnight. After this, rinse with warm water again and dry the specimen with soft clean cloths.
This will help you remove any unwanted debris from your fossil and help in the polishing procedure. In most cases, you can use a lint-free cloth and soapy water to remove unwanted dirt and dust. Generally, the first grit you use, the coarsest, is also part of cleaning your fossils.
TIP: Fossils are remnants of organisms that have integrated into sedimentary rock. Some of these fossils contain ancient DNA. Find out more about DNA in rocks in the article below:
Do Rocks Have DNA? I Have to Disappoint You, But..
How Do You Make Fossils Shiny?
There are various ways to make your fossils shiny if you clean and polish them correctly. No matter what technique you may use, you can always switch between them to compare results and experiment until you see what works best for you.
To make your fossils shiny, you can use an acrylic coating. Acrylic varnish is often used to protect and bring out the color and shine of fossils.
Mineral oils are also a great option because it dries more pleasantly than vegetable oils such as olive oil. You can also use water-soluble synthetic polymer (PVA), paraloid B-72, cyanoacrylate, or butvar.
There are plenty of other methods, but it all depends on what you want to achieve and if your fossil can withstand chemical intrusions or work better with more natural ones.
BTW: If you are looking for the best UV light for rockhounding, find out my picks below (Amazon links):
- BEST OPTION: Convoy 8+ 365nm UV LED Flashlight with Patented Glass Filter
- BUDGET OPTION: Karrong Rechargeable 1200 Lumen 395nm UV Flashlight
- OPTION FOR INDOOR USAGE: Prime Upgraded Big Chip 396nm UV
Conclusion
Finding fossils is one thing, but taking care of them is another. Whenever you want to display your impressive collections to friends and family, always follow the standard cleaning and polishing techniques mentioned above.
And don’t forget to add some coating to bring out the colors and shine whenever you want to expose your collection!
TIP: If you wish to drill holes in rocks, you will need the right tools and techniques to use them properly. Find out the step-by-step guide in the article below:
DIY: Drilling Holes In Rocks With & Without Dremel Drill