As an Amazon Associate, I earn from qualifying purchases with no additional costs for you.
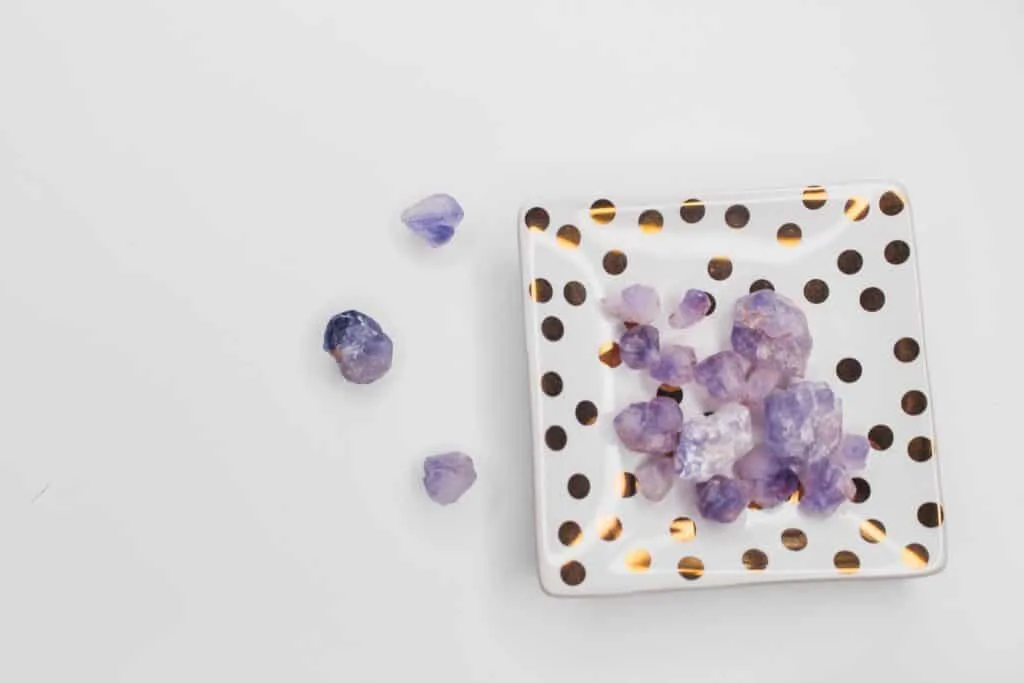
Rock collecting, also known as rockhounding, can be anything from those initial moments of curiosity to a full-blown passion for Earth’s treasures. More than two years ago, I took my first steps into this fascinating world, and the sheer possibilities blew me away. This article will guide you through the exciting world of rockhounding, from those first captivating finds to building your stunning mineral collection.
First, research the rocks you want to find. Information on how a type of rock forms, typical surrounding geology, localities where you can find it, and how to search is available online. Now you can go on an adventure to find it. Once home again, test and inspect the rock to identify it. Lastly, label, clean, polish, and add it to a display.
Some of these steps are more important than others. For instance, I love knowing everything about a rock or mineral before going out to hunt for it. I’d like to take you through the best ways to perform each step and which parts are most important.

If you want to check out the best rock collection displays, you can find them here (Amazon link).
Step 1: Research about Rocks and Minerals
The world of rocks and minerals is endlessly fascinating, and there are countless treasures to discover! While exploring without a specific goal can be a blast, there’s something uniquely satisfying about targeting a particular type of stone.
Don’t worry; you don’t need to be an expert to start. Some rockhounds love the thrill of the unexpected, while others, like myself, find it rewarding to research a specific rock or mineral.
Knowledge empowers you – it boosts your chances of finding what you seek and makes that moment of discovery even sweeter.
So, what kind of stones do you want to find?
To answer this question, I suggest you start with something found locally. Luckily, the earth is made of rocks and minerals, and the ones that seem rare sometimes aren’t if you know where to look, so you’re never too far away from a beautiful find.
That being said, the geology of a region decides which minerals can show up there.
I’ll give you a few ways to find which rocks are around you:
- Search for mines around you on mindat.org. The types of minerals they mined for in the past will tell you what is around.
- Go to local rock shops or museums. Be sure to chat with the owners or employees because those are rock enthusiasts like yourself, and they’ll have all the secrets!
- Watch some Youtube videos on the geology of where you live. Besides being interesting, this will tell you which and how to find local rocks and minerals.
These tricks are especially useful because they will inspire you on what to search for and tell you where to find it.
For example, if you find a tourmaline mine, you know that tourmaline is somewhere around that area, whether in an old mine dump or still in the ground. You can research the mine or the mineral itself to find out more about how to find it.
That brings me to the last point of this very important research section: geology.
Geology is much more complex than I learned in my high school class. Just because a mineral was found on the same mountain you’re searching on, doesn’t mean it will be where you’re searching.
Let me explain with an example. While searching for some smokey quartz and amazonite near Pikes Peak in Colorado Springs, CO, USA, I hit a roadblock.
I was searching right around where others had reported finding amazing specimens, but I came up dry. I went home, researched more, and discovered that most quality specimens of that specific mineral formed in air pockets in the granite, which only formed on the rim of collapsed upheavals.
All that to say, the quality specimen was at the same elevation but was located on the outside of a very elusive circle.
In short, you’ll also want to research the forming process and know when you’re close.
TIP: Still don’t know where to start? The easiest way to start is to look around your backyard. A lot of interesting rocks can be found there. Find out more in the article below:
12 Gemstones You Can Find in Your Backyard Right Now
Step 2: Search for Rocks and Minerals
Searching is widely agreed to be the most fun part of rockhounding. You get to go out and be an explorer, miner, or prospector for a day, which is an amazing part of this hobby.
That said, the most fun part is when you successfully find a stone, so don’t forget to research to give yourself a better chance!
Hopefully, you’ve narrowed it down to a few places to search in the research section. Now it’s time to get out there and search.
Here are a few things to think about bringing on your search:
- Hammer and chisel
This will allow you to explore rocks that look promising. I recommend buying this hammer and this chisel set for a start (Amazon links).
- Fingernail brush
I’ll lobby for the fingernail brush as a rock-cleaning tool every day of the week. You’ll need to brush the dirt off rock faces and out of crevices, and this is the best tool for the job. I recommend buying this cheap set of five brushes (Amazon link).
- Quality gloves
Barehand might be more comfortable, but only until you’re digging through sedimentary rock flakes, reaching into a crevice for crystals, or even just handling rough stones for a few hours.
If you are interested in buying safety gloves, I recommend buying one of these two safety gloves here or here (Amazon links).
- A larger container than you think you’ll need
Every rockhound has found themselves in a position where every rock they find is better than the one before. But how do you know?
You usually don’t until you get home, therefore sometimes it’s best to take both and decide once they’re clean and you have good lighting.
I recommend buying this larger rock container (Amazon link) which is great for small and medium rocks.
- An empty pill bottle
While you can use various tools for your search, I found great success using a rock hammer and a small hand shovel. These proved particularly handy when hunting for red garnets and Apache tears. Remember, don’t just focus on finding the rock or mineral itself – look for clues too!
During the Gold Rush, prospectors knew that following quartz veins often led them to gold deposits.
Another example: you may be nearing an agate when you come to some rock that is softer than its surroundings and looks more affected by erosion.
Each rock will have different telltale signs; you’ll want to try to recognize these to make the search easier!
When you are out on your search, don’t forget to make it fun. You can incorporate it in a hike if you like that too, listen to music, or bring someone to chat and hunt with. It’s a great family activity too!
My last tip for your search is to go slow. Minerals don’t usually form massive pockets which are easily noticeable. Trust your source and your location and get up close to the material to search in it.
One of the easiest mistakes to make is to discount a rockpile, face, or crevice just because it doesn’t look different at first glance.
TIP: If you are interested in buying rockhounding tools (and also safety equipment), check out my recommendations in the articles below, I hope they help you make a decision on which one to buy:
Recommended Rockhounding & Safety Equipment
Step 3: Test and Identify Your Rocks
Once you get home with your rocks, you’ve probably already spent a good amount of time thinking about what they could be, hopefully, the very type you were out looking for! But there’s only one way to know for sure what it is: testing.
The most useful properties of a rock or mineral when it comes to testing to identify them are:
- color
- luster
- streak
- hardness
- cleavage fracture
- crystal form
Some of these properties are only obvious after a clean, so if you need to, skip to the clean part of step 4 and come back. Don’t polish yet though!
You’ll want to identify your specimen before you polish it (if you polish it) so that you know what to use and what not to use in the polishing process.
Because color is fairly easy, I’ll skip to luster. Luster is a geologist’s way of describing how a rock reflects light. The main question to answer is: is it shiny or dull?
Try to classify it yourself by holding it in good lighting (fluorescent if possible) and identifying if it looks almost metallic, earthy, vitreous (glass/transparent), waxy, or pearly.
Streak is the color of the mark made when the rock is run across a streak plate. This is a more reliable metric than color because it’s usually the same for a specific mineral, where color can sometimes vary.
White porcelain is used for a standard streak plate, but you’ll want to buy a cheap test kit because it’s very fun to identify minerals.
Hardness is rated on a scale of 1-10 called the Mohs Scale. Testing kits come with rocks of every hardness so you can find out for sure.
If your rock can scratch a certain mineral, it is harder than that mineral. Fingernails, pennies, glass, and knives can be used in place of a kit (with hardness of 2.5, 3.5, 5.5, and 6.5 respectively).
Cleavage and fracture define how a rock breaks. Rocks with cleavage break along flat surfaces, and rocks with fractures break along random surfaces.
These are typically described by the number of directions that are shown by a break in a mineral and whether or not it forms sharp angles, soft angles, or right angles when broken.
Lastly, crystal form is the shape taken by a mineral as it cools. This is easily identifiable if you have a freely formed crystal, but is not helpful if not.
Some minerals have other properties like magnetism or reactions to acid. If you are testing for a specific mineral that shows these properties you should test for the first to narrow it down easier!
Once you’ve performed all the tests you can, search a rock property database and find which stone you think matches the properties the best.
Quick reference for testing and identifying rocks:
| Property | How to test for it? | Rating Options |
|---|---|---|
| Color | Clean and inspect in light with good CRI (Color rendering index) | Brown, black, red, etc |
| Luster | Clean and inspect light reflection off the surface | Metallic, earthy, vitreous, waxy, pearly |
| Streak | Scratch on a white porcelain plate | Same as colors |
| Hardness | Scratch rocks with known hardness | 1-10 |
| Cleavage | Inspect already broken edges or break yourself with a tiny chisel | Depending on the direction of broken surfaces |
| Fracture | Same as cleavage | Conchoidal, earthy, hackly, splintery, uneven |
TIP: Mineral identification is an integral part of work for both mineral collectors and scientists. Check out the complete step-by-step guide on identifying minerals in the article below:
Easy Step-by-Step Mineral Identification (Expert Explains)
Step 4: Label Rock and Mineral Specimen
One main source of satisfaction from a rock collection is looking at it holistically and seeing how much diversity is represented. Labels are a great way of quantifying just how much work you’ve put in and how much great material you’ve collected.
For example, if you’re able to go on a rockhounding trip for vacation or incorporate one in a vacation, your rock collection may end up representing finds from all around the country or even all around the world.
Even with the small sample size, your collection would be a study on the geology of the earth, which is definitely interesting enough to deserve some labels!
Type of rock is also a great thing to document. You might think that you’ll never forget that one specific stone you found, but if you continue rockhounding, you’ll see enough mind-boggling stones to forget things about some pieces of your earlier collection.
Just label it and every time you see the stone you’ll remember more specifics like how long it took to find it, what was the experience of the search like, and more. At the very least, it’s a great way to reward yourself for doing all the work to test and identify the stone.
Physical labels can come in many forms, but should mainly not take away from the view of the specimen. If you plan on displaying your collection on a shelf, you may think about triangle-folded paper labels set next to each of your best specimens. If the display is more compact, you may make a small sticker to put on a less impressive side of the stone.
You can choose what to include in the label, and it should largely depend on what you like most about rockhounding.
I recommended putting the date and location where it was found, the mineral’s name, the weight, and even some properties you’ve identified which stand out, such as high hardness or conchoidal fracture.
Below is a list of possible items to document on a label. Museums typically chose the location, mineral name, and a brief description, but you should choose the ones most interesting to you.
- Name of mineral(s) in the specimen
- Date found
- Location found (geological)
- Context of the find (which vacation or search)
- Interesting properties you’ve identified
- Weight
- Relative or absolute dimensions
- Surrounding natural geology when you found it
Step 5: Clean or Polish Your Rocks
The proper methods for cleaning and polishing depend on how you plan to display your collection. Before you do any of it, you’ll want to identify the hardness of the stone you want to clean in order to be sure that the cleaning method will not break the stone.
For most stones, soap, warm water, and a few minutes of scrubbing with a fingernail brush will do the trick well.
For softer stones, it’s better to use a toothbrush and spent a little more time on it, angling so that all the cracks are taken care of. Once it’s clean you can think about how you want to display it.
If the rock makes an interesting color pattern when smoothed, you might want to smooth and polish it. Conversely, if it’s rarer and has a crystalline structure, you may want to leave it in its initial form.
If you want to round, smooth, and polish your stone, the process is outlined in another article called “How to Polish Rocks With a Dremel Drill” Another option for smoothing and rounding the stones is tumbling them in a vibratory or rotary tumbler.
TIP: And what if you don’t own a rock tumbler or dremel drill? Don’t worry, you can even tumble rocks without these tools. Find out more about how to do it in the article below:
Can You Tumble Rocks Without a Tumbler? Step-by-Step Guide
Step 6: Display Your Rock and Mineral Collection
There are many options for a display, and they depend mostly on where you’ll be most inspired by them. Tap into your spiritual side to decide how the finished product makes you feel, and then from there decide where you want to put it.
If you’re a handy person, it’s very rewarding to construct your own display with some small cheap LED spotlights and some black felt, especially for a large, impressive specimen.
For smaller, more common stones, it’s an awesome look to fill a glass container with tumbled stones of different colors. I’m relying on your creative competence for this one, but here are some inspirational displays to get your mind rolling.
| Shelf with assorted stones | 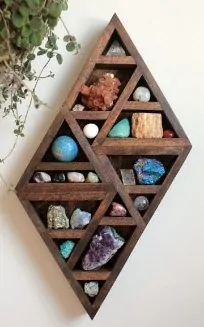 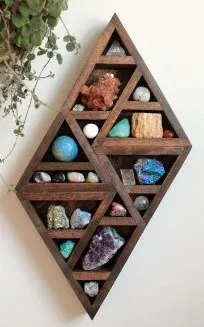 Reference |
| Geode Lamp | 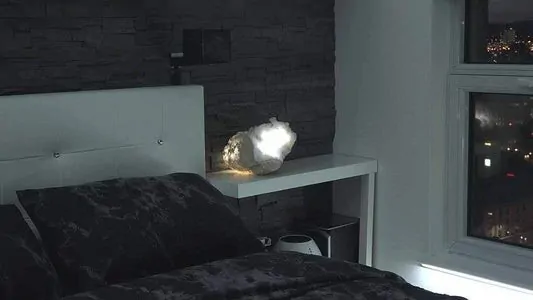 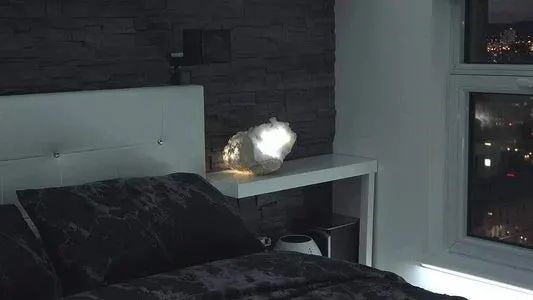 Reference |
| Crystal Garden | 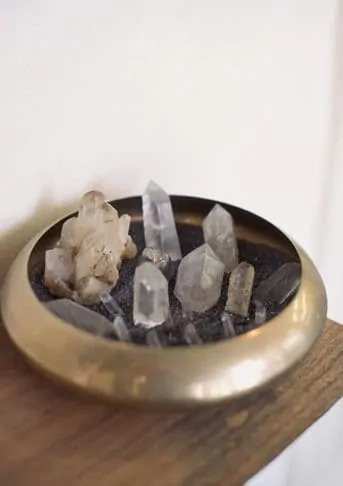 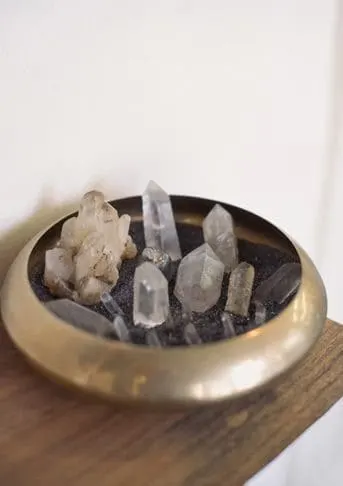 Reference |
| Sorted Case |  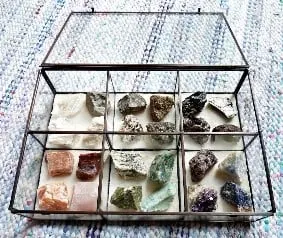 Reference |
Conclusion
To wrap it up, keeping a rock collection is a very gratifying use of spare time. It keeps you in touch with your natural surroundings and gives you ways to explore the geology of any place in which you find yourself – whether on vacation or in everyday life.
It also provides endless fun times spent with family or friends searching, identifying, labeling, displaying, or researching rocks.
Lastly, the collection adds great personality to any space as a display. Don’t be afraid to pick your favorite part of the process and spend most of your time with that one part!
Remember, it’s mostly just about having fun appreciating the natural wonders of the earth.
TIP: So where to find all the rocks for your rock collection? Well, I hope my articles about the best rockhounding locations in each state in the United States can help you. You can find them all below:
Best Rockhounding Locations in the USA + What to Find There