As an Amazon Associate, I earn from qualifying purchases with no additional costs for you.
Mineral luster is an essential property of mineral identification. Since the first year of professional geological education, luster is carefully determined for each mineral sample in reference collection during sweet sunny days of student life.
Testing mineral luster is a crucial step in mineral identification. Determination of metallic or non-metallic luster as a first step can narrow down possible mineral candidates significantly and save test time substantially. No additional devices are needed to determine luster, just a careful observation.
At first glance, determination of luster is a piece of cake. It is! But as usual, there are some tricky minerals and pitfalls. Today we will give you some hints on how to do it effortlessly and combine mineral luster with other physical properties to identify minerals accurately like a PRO.

If you are interested in checking out the best books about rock and minerals identification you can find them by clicking here (Amazon link).
What is Luster in a Mineral
Luster is a physical property that is always determined when identifying minerals. It is as important as color, hardness, streak, and cleavage. Moreover, luster can sometimes be used as the first step of the process, even before the more noticeable color.
Luster is a mineral’s ability to reflect light from the surface. It depends upon a mineral’s refractive power, degree of transparency, and structure. There are two main types of luster: metallic and non-metallic. Determination of these two types allows to speed up the mineral identification process.
Why is Luster Important for Mineral Identification
Luster is vital for mineral identification as it allows the first narrowing of probable minerals by checking whether it is metallic or non-metallic luster.
Metallic luster is a sign of sulfides mostly. Also, luster is a physical property that can help with identification when other properties overlap.
How to Determine the Luster of a Mineral
Determination of luster is one of the most straightforward basic properties that can be determined. Like color identification, luster is also a subjective perception, especially when you try to differentiate between resinous, waxy, and greasy luster. However, the most important metallic and non-metallic laster can be identified without uncertainty.
To determine the mineral’s luster is needed to carefully examine the mineral surface under good light conditions. No special equipment is required. Check the reflection of light on a fresh and clean mineral surface. If it resembles metal – the luster is metallic. If not – further subdivision is needed.
How to Do a Luster Test on Minerals

The luster test (sometimes called the reflection test) is one of the easiest to perform. You don’t need any additional equipment to determine the luster of minerals. That is why geologists always take luster into account.
However, sometimes they do it automatically and intuitively just by looking at a mineral sample. We will provide you step by step instructions on what you need to pay attention to during the luster test. And no doubt, you will do the luster test at a glance like a PRO.
To do a luster test, you need to clean the surface of the mineral, dry it, take it to good lighting conditions or use a flashlight. Then, rotate your mineral to observe how light reflects from different sides of your mineral sample. Finally, make an assumption about what the mineral’s surface looks like.
Step 1. Cleaning the surface.
Most probably, you have already cleaned the surface before observing a color or doing a scratch or hardness test. But it never hurts to repeat the procedure again. We recommend using nonwoven napkins or gem cloths to clean a mineral sample.
Important! The surface of the mineral should be dry. If you washed your sample, please, don’t judge the luster until the mineral is dry.
Step 2. Removing weathered surfaces.
If you took a sample from a field after a rock hunting, ensure the mineral is fresh and not weathered. The weathered surface looks rusty and earthy. It is soft and gets your hands dirty. Mineral with a weathered surface has a dull and earthy luster and doesn’t help with mineral identification.
Step 3. Light source.
Choose the right light. It can be a sunny day, and you can make your identification pleasant by standing near the window. Alternatively, use a lamp or a flashlight.
TIP: Minerals and rocks, which glow under ultraviolet light, are usually perceived as a miracle. Check out the common glowing rocks and minerals in the article below:
12 Rocks & Minerals That Glow Under UV Light & Black Light
Step 4. Luster test.
Examine your sample. Rotate your stone, move it back and forth, and try to concentrate a ray of light on the crystal faces of the studied sample. Carefully observe both perfect crystal faces and cleavage planes of places of irregularities.
Abstract from the color of mineral and transparency. No matter how bright the mineral’s color, you should only pay attention to how reflective the surface is.
Step 5. Determination of luster. Metallic or non-metallic.
This is the first important decision you have to make. It allows to narrow down possible mineral candidates just to a few mineral classes.
You can use some standards to help you differentiate between metallic and non-metallic luster. Place some object made of metal near the mineral. Ideally, it should be a subject with a smooth and polished surface.
For example, knives, cutlery, coins, machine tools, etc. Commonly minerals with metallic luster are opaque. Rarely translucent and in sporadic cases transparent.
If the luster observed is metallic, the mineral belongs to sulfide, oxide, sulfosalts, or native element classes. At this point, your luster test is finished.
If luster is non-metallic, you should additionally identify the exact non-metallic type. Then, please, follow Step 6.
Tip! How to effectively move further with identification if the luster is metallic?
Let us advise you to pay attention to the color of the streak and mineral crystal habit. The cubic habit of pyrite and magnetite octahedrons can help you quickly identify these mineral species.
But the most common case with massive sulfides is that they have a metallic luster, are opaque, and weigh more than they look. The streak’s color will let you promptly differentiate between the most common sulfides.
TIP: Mineral’s streak test is underestimated and sometimes missed during an identification process. Check out the step-by-step guide in the article below:
DIY Guide: Testing Mineral’s Streak (Explained by Expert)
Step 6. Identification of non-metallic luster.
Non-metallic lusters are adamantine, vitreous (glassy), pearly, resinous, waxy, greasy, silky, and dull (or earthy). Further, you will know them all in detail. The most common luster is glassy (or vitreous). Most silicate carbonates, phosphates, and other oxysalts have vitreous luster.
- If the mineral resembles a piece of glass – the luster is vitreous.
- If it is too sparkling compared to glass – the luster is adamantine.
- If the sample has a pleasing gentle sheen resembling a pearl or nacre – the luster is pearly.
- If the mineral surface has a delicate reflection like a silk cloth – the luster is silky.
- If the mineral surface looks like it has been oiled – the luster is greasy.
- If the surface is greasy but looks matte – the luster is waxy.
- If the surface is even more mate and resembles resin more – the luster is considered resinous.
- If the mineral surface doesn’t reflect any light back – the luster is considered dull or earthy.
Step 7. Comparison of the results.
When luster is identified, the lust step is consulting with literature and mineral identification tables and help sheets. We also recommend not to make a guess by only one physical property tested. Instead, proceed further with a complete set of mineral properties.
BTW: Do you want to know more about rock and mineral identification? The books listed below are the best ones you can find on the internet (Amazon links):
- Smithsonian Handbooks: Rocks & Minerals
- Gemstone & Crystal Properties (Quick Study Home)
- Ultimate Explorer Field Guide: Rocks and Minerals (National Geographic Kids)
Different Mineral Lusters (Metallic, Waxy, Glassy & Resinous)

Different types of mineral luster can be divided into two main groups: metallic and non-metallic. The non-metallic group is further subdivided into adamantine, vitreous, pearly, silky, greasy, waxy, resinous, and dull (or earthy). In addition, some types of luster are typical to specific mineral classes.
Metallic
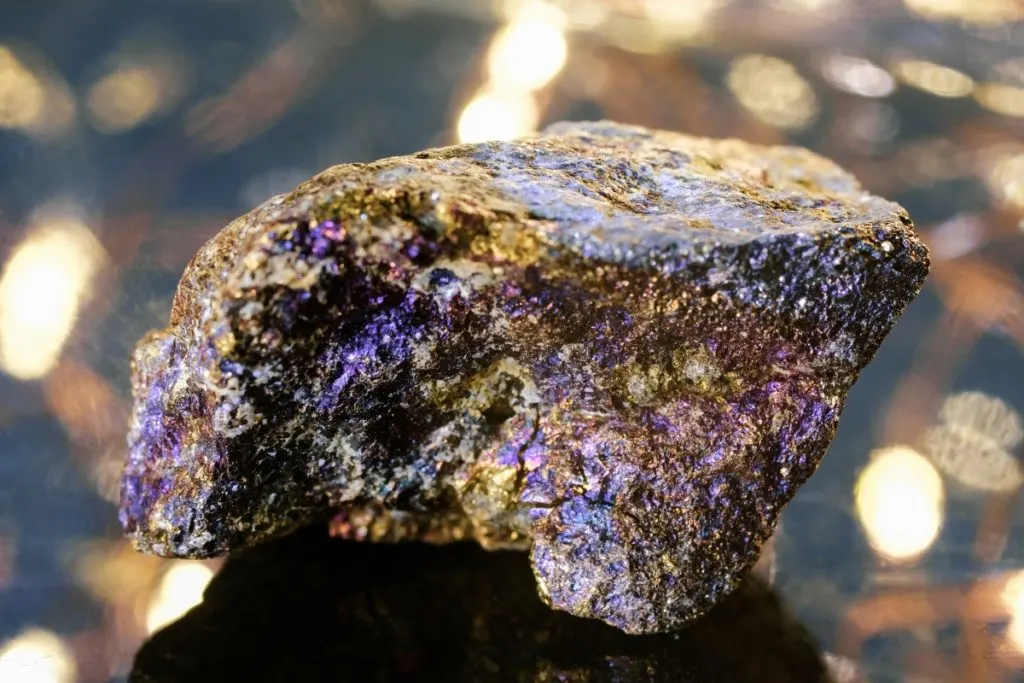
Determination of metallic luster is essential in luster identification. The metallic luster looks the same as it sounds. Mineral faces look like polished metals and are very reflective.
The body color of the mineral (silvery or gold yellow) can even emphasize its metallic look. Typical examples of minerals with metallic luster are galena and pyrite.
For more examples, please, refer to the table below.
Adamantine
Adamantine luster is called after a diamond that typically represents that type of luster. Sometimes minerals like cassiterite, corundum, sphalerite, titanite, rutile, zircon, and sphalerite are also considered to have adamantine luster.
TIP: The advantage of the hardness test is that it can be easily done at home or even in the field while rockhounding. Check out the complete guide in the article below:
DIY Guide: Testing Mineral’s Hardness (Explained by Expert)
Vitreous (Glassy)
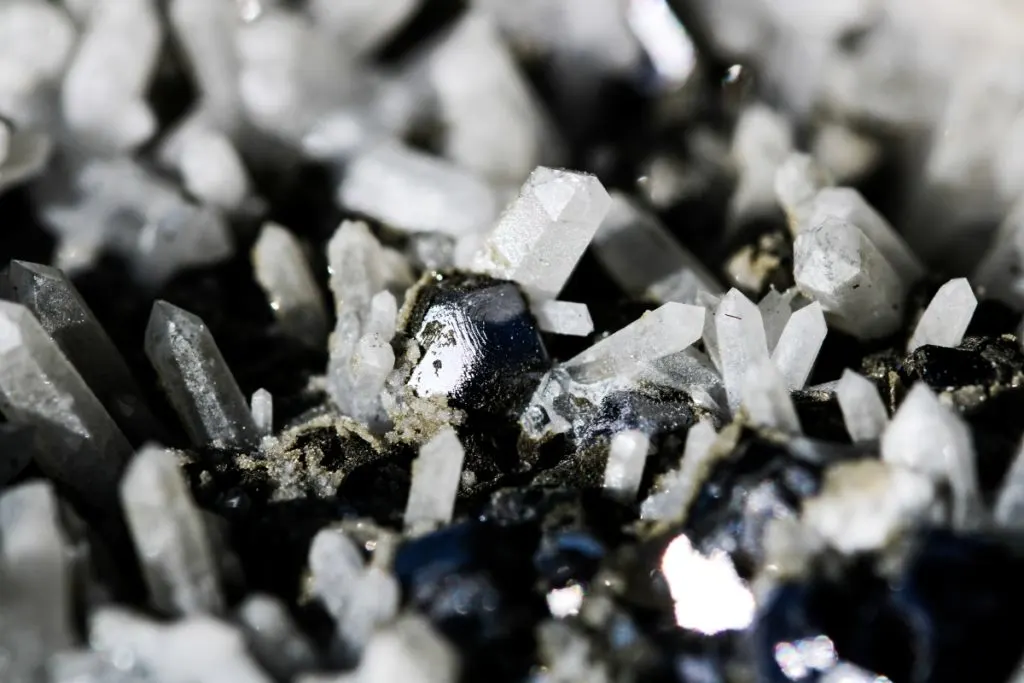
Vitreous luster is the most common for transparent and translucent minerals. Collectors and rock hunters commonly deal with minerals that have vitreous luster. Vitreous luster is a luster of a piece of glass. Quartz is the best example to illustrate vitreous luster.
Pearly
Not only pearls and nacre have pearly luster. Minerals with perfect cleavage like muscovite and other micas also look pearly.
Silky
Silky luster is typical for fibrous minerals. The same as light reflects from fibers of the cloth, it reflects from tiny fibrous minerals, creating delicate silky luster. An outstanding example of silky luster is the selenite variety of gypsum.
Greasy
Greasy luster is easily identifiable if you ask, “Does this mineral look like covered with oil?”. That is why greasy luster is sometimes called oily. It can be observed on massive rose quartz debris. It is hard to believe that rose quartz chunks are not impregnated with oil.
Waxy
Waxy luster also looks like artificially impregnated surfaces. Waxy luster differs from greasy because it is more mate and doesn’t sparkle so powerfully.
Minerals with waxy luster are usually made of tiny mineral aggregates which scatter light and produce a waxy appearance on the surface. Agate and chrysocolla in turquoise are excellent illustrations of waxy luster.
TIP: Licking rocks and minerals in geology is a common practice to define some kind of minerals and, of course, a bunch of fun. Find out more about this technique in the article below:
Licking Rocks in Geology: Why & How (Answered by Geologist)
Resinous
It may be challenging to differentiate resinous luster from waxy. Resinous looks even more mate and dull. It can be better observed in amber, which is not a mineral but an ancient fossilized natural tree resin.
Dull (or Earthy)
This term is applied to minerals that lack any luster in their classical understanding. These minerals do not reflect light and look matte and dull. They are also mostly highly porous aggregates that cannot be polished. Clays (montmorillonite-smectite, illite) are the best illustration of earthy luster.
Important note! Sometimes people operate with the terms like sub-metallic or sub-vitreous. It indicates that luster is not so strong to be called metallic and vitreous.
Here you can see a table of luster and minerals that can have this luster. The ideal representative of luster is written in bold:
| Type of Luster | Mineral |
|---|---|
| Metallic | Galena, pyrite, magnetite, arsenopyrite, chalcopyrite, graphite, bornite, cassiterite, chromite, goethite, hematite, marcasite, pyrrhotite, and rutile. |
| Vitreous (glassy) | Quartz, beryl, tourmaline, fluorite, azurite, lazulite, smithsonite, and wulfenite. |
| Adamantine | Diamond, cassiterite, corundum, sphalerite, titanite, rutile, zircon, and sphalerite. |
| Pearly | Calcite, muscovite, feldspars, and hemimorphite. |
| Silky | Gypsum (var. Satin Spar), serpentine, anthophyllite, aurichalcite, chrysotile, malachite, pectolite, tremolite, and ulexite. |
| Greasy | Rose quartz, nepheline, amblygonite, datolite, lizardite, zircon. |
| Waxy | Agate, chrysocolla, opal, talc, and turquoise |
| Resinous | Almandine, amber, pyromorphite, realgar, sulfur. |
| Dull (earthy) | Kaolinite, limonite, montmorillonite-smectite, illite, limonite, and chalk. |
TIP: Double refraction or birefringence is a typical physical property for a lot of minerals. Find out more about this unique phenomenon in the article below:
8 Minerals That Show Double Refraction (+ Explanation Why)
What Minerals Do Not Have Luster
Luster can be determined in all minerals. However, minerals with dull and earthy luster can sometimes be perceived as minerals that don’t have a glassy finish. Minerals with dull luster are mostly clays (kaolinite, montmorillonite-smectite, and illite), limonite, chalk, and sometimes hematite and azurite.
Additionally, almost any mineral may have no luster, or it’s better to say have dull or earthy luster. These are weathered surfaces of minerals gradually dissolved and destroyed by the atmosphere. Also, some minerals that have radioactive elements in their structures can have a dull luster as radioactive decay destroys mineral samples. An example is a metamict zircon.
Conclusion
Luster is a vital physical property of minerals, especially in differentiating between sulfides (which have metallic luster) and non-sulfides minerals (non-metallic luster). The luster test (or reflective test) checks how light reflects from the mineral surface. No additional equipment is needed for the luster identification. Just careful observation in good light conditions determines the mineral luster.
There are two main groups of luster metallic – typical for sulfides, sulfosalts, native elements, and some oxides; and non-metallic. The non-metallic group can be further subdivided into
- Adamantine
- Vitreous (glassy)
- Pearly
- Silky
- Greasy
- Waxy
- Resinous
- Dull (earthy).
Remember to test a mineral luster on the mineral sample’s unweathered clean and dry surfaces. Also, don’t forget to check other physical properties to make the final mineral identification.
TIP: Mineral identification is an integral part of work for both mineral collectors and scientists. Everybody wants to know what minerals they find during rock hunting. Check out the ultimate step-by-step guide in the article below:
Easy Step-by-Step Mineral Identification (Expert Explains)
