As an Amazon Associate, I earn from qualifying purchases with no additional costs for you.
There is a stereotypical image of a geologist walking in the mountains with a hammer and a backpack full of stones. This image was true, perhaps, a hundred years ago. Today, geologists use a vast variety of tools, both traditional and simple, as well as high-tech modern equipment.
Simple tools used by geologists include a geological hammer, sledgehammer, chisel, gemological loupe and hand lens, compass-clinometer, end, etc. Complex instruments for geological fieldwork usually include geophysical equipment.
However, it is worth noting that the arsenal of tools for each area of geology and for each type of work is different, as it has to solve different kinds of research. This is especially true for laboratory equipment. For example, a geochemical laboratory has various crushers, mills, pulverizers, muffle furnaces, laboratory balances, etc. The sophisticated equipment may include multiple spectrometers, microscopes, etc.
This article will tell you about the most common tools exploration geologists use during geological research in the field and laboratory.
If you want to check out the best rockhounding tools, you can find them by clicking here (Amazon link).
Geological Tools for Fieldwork
Geologists use fieldwork tools to collect geological information and materials that will be further used for laboratory and deskwork. Based on the data obtained, geological reports will be prepared regarding the investigated area.
We will tell you about the tools used in the geological exploration of solid mineral deposits. Some of them (geophysical tools in particular) are also used to explore oil, gas, water deposits, etc.
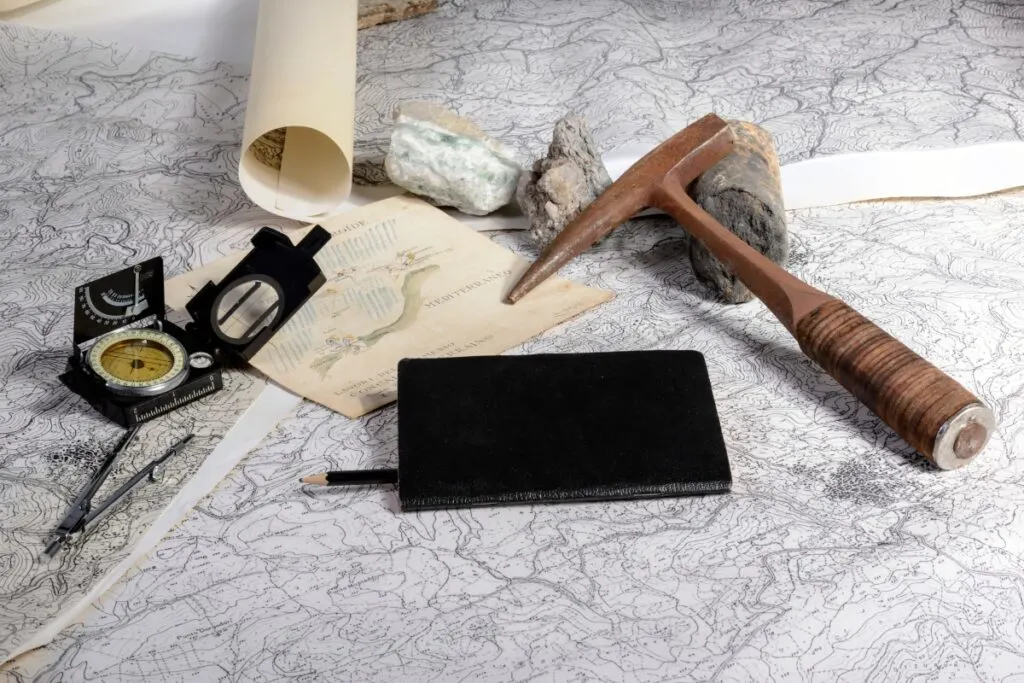
Hammers and Sledgehammers
Hammers and sledgehammers are essential tools for geologists during fieldwork. A geological hammer is necessary for most geological fieldwork, collecting samples and creating fresh surfaces to describe the rock and the minerals within it.
A sledgehammer may be necessary for igneous, metamorphic, and well-cemented sedimentary rocks if good quality and large samples are required.
Usually, geologists use a geological hammer rather than one designed for other materials such as wood or metal.
This is because a head that is robustly mounted onto the hammer shaft, made of a suitable grade of steel that will not splinter, and is of an appropriate ergonomic design. Brick and stone hammers can be used if a specific geological hammer is unavailable.
Chisels
If the rocks have no good partings or fractures and precisely placed samples are required, it is best to use a chisel. Many of the larger chisels are now supplied with hand guards.
A small pencil chisel is helpful for delicate specimens such as fossils or minerals. A lump or crack hammer may be beneficial if you need to do lots of chiseling.
TIP: Having the right tools on hand will allow you to worry about your hobby more than the tools themselves. Check them out in the article below:
Recommended Rock Hammers, Picks, Chisels & Bars For Rockhounding
Safety Equipment During Working with Hammer
WARNING! Always follow safety techniques and wear appropriate personal protective equipment, such as eye protection, gloves, a hard hat, and steel-toed boots when hammering rocks. Sharp rock fragments can seriously injure you if you neglect protective gear.
Such work also poses a danger to other members of the field team. Therefore, be aware of your surroundings and ensure no one stands too close when using your tools. Warn people nearby before you start hammering, and keep them at a safe distance.
TIP: The most crucial tip for rockhounding is to stay safe, you and everyone around you. Check out the best safety tips while rockhounding in the article below:
PRO Tips for Beginner & Experienced Rockhounds + Safety Tips
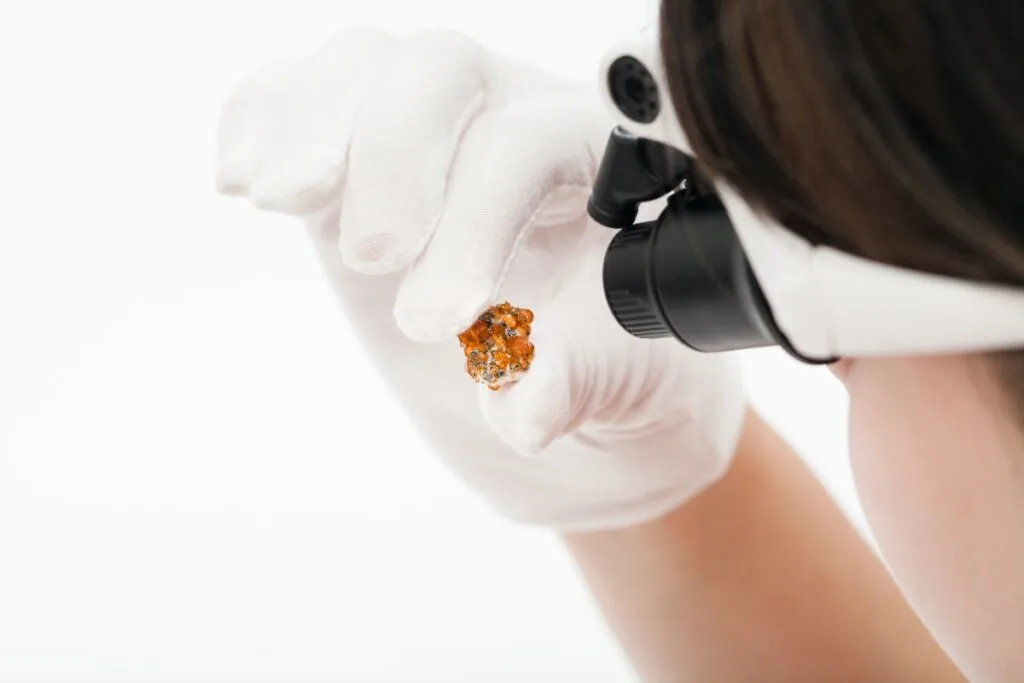
Gemological Loupe, Hand lens, and Pocket Microscope
The gemological loupes and hand lenses are essential equipment for the detailed observation of all rock types and fossil material. These tools greatly help identify minerals, rocks, and paleontological remains.
Most have a lens with 10* magnification, and some contain a 10* and a 15* or 20* lens. It is also possible to obtain lenses with built-in lights, enhancing the image considerably. A gemological loupe can examine small crystals in rocks or tiny minerals in placers.
Unlike a gemological loupe, a hand lens is used for different tasks. It is usually used for examining the surface of large samples rather than small ones.
With its help, for example, it is convenient to determine the percentage content of minerals in a rock, as it covers a much larger observation area than a 10* power gemological loupe.
The hand lens has several advantages and disadvantages compared to the gemological loupe. Among the benefits, it can be noted that its focal distance is much greater, so it does not need to be brought close to the face to obtain a clear image, making it much more convenient to use.
One of the drawbacks of the hand lens compared to the gemological loupe is that it has a significantly lower magnification, for example, 4*. However, this is not necessary for studying not-small objects.
There are also a large number of pocket-sized electronic magnifying devices available now. These can be pocket microscopes or special lenses that attach to a smartphone.
In this case, the magnified image of the object is immediately displayed on your smartphone screen, and you can take a photo of it and send it to your colleagues or upload it to a database.
TIP: Using the right tools and supplies can help you find and identify geological treasures. Check out the best ones in the article below:
Recommended Dichroscopes, Hand Lens, and UV Lamps for Rockhounding
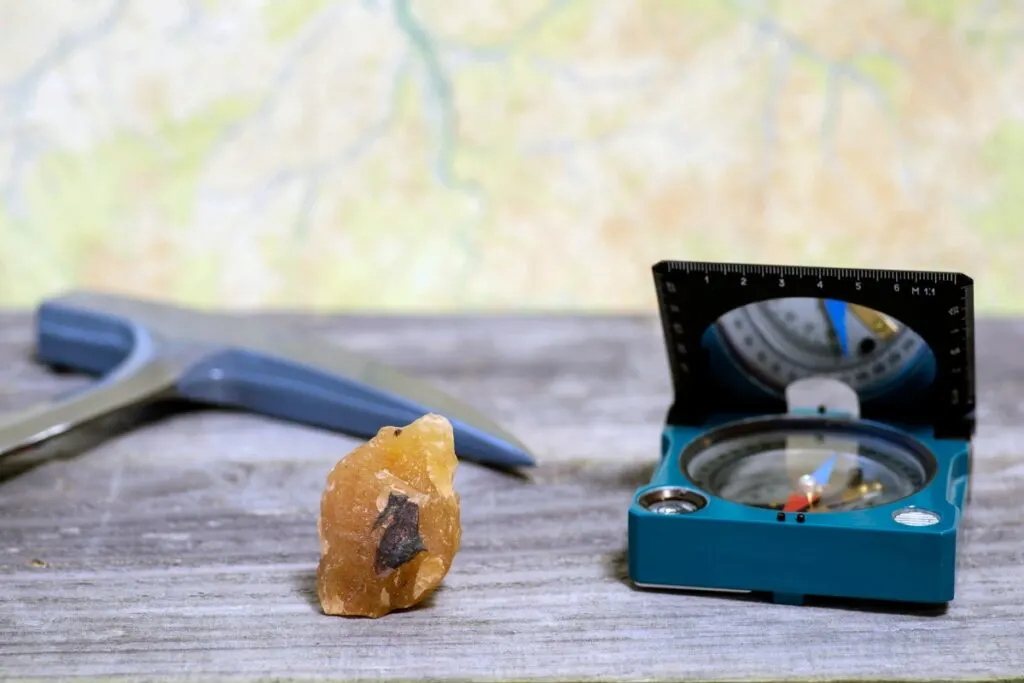
Compass-Clinometer
This tool is essential in geological mapping. It is used to determine several important characteristics of rock layers, which are then used to build geological maps and cross-sections.
The compass-clinometer is used to measure:
- The orientation of geological planes and lineation concerning the north.
- The angle of dip of geological features concerning the horizontal.
This allows an accurate record of the geometry of the features to be constructed. The compass-clinometer can also be used with a topographic map to determine location accurately.
BTW: Do you want to know more about rock and mineral identification? The books listed below are the best ones you can find on the internet (Amazon links):
- Smithsonian Handbooks: Rocks & Minerals
- Gemstone & Crystal Properties (Quick Study Home)
- Ultimate Explorer Field Guide: Rocks and Minerals (National Geographic Kids)
Field Notebook
The field notebook is essential for documenting the data you collect while working in the field. It should include detailed notes on the data’s location, the characteristics of different rock formations, their composition and texture, and any notable features.
The field notebook should also note the location of any collected samples, the position and orientation of photographs taken, cross references to published information, and notes on any ideas you have for interpretation or questions raised by your observations.
In addition, the field notebook usually links together any other components you might have used to record data and ideas in the field. For instance, an electronic database is held on geophysical equipment, field maps, annotated figures, and graphic logging sheets.
One way to think of your field notebook is as an “academic” diary, i.e., a record of your observations, ideas, interpretations, and questions over the fieldwork period.
Often field notebooks include fewer academic notes, for instance, the weather, someone you met that day, where you stayed or ate, if you were ill, or your mood.
This is because all of these serve as an aide memoire when you return to your notes, provide information for future trips, and can help you assess how good your notes might be for that particular day.
GPS and Altimeter
Global positioning systems (GPS) use ultra-high-frequency radio wave signals from satellites to trigonometrically derive your position a few meters laterally. A wide range of GPS systems is available on the market now. Increasingly, mobile phones contain a GPS unit.
GPS helps geologists a lot during fieldwork. With their help, geologists can solve the following tasks:
- Determine their coordinates at a specific time.
- Determine the coordinates of sampling points.
- Plan a route to a destination.
- Track the movement and record the path of the group.
- Determine absolute and relative changes in elevation and other measurements.
But remember that GPS units do not work in deep ravines and on some coastal sections. They are also not remarkably accurate for altitude.
Despite this, GPS is not a total substitute for a map and a compass. Geologists also know how to navigate with an ordinary map and compass, as electronic devices are less reliable, especially in harsh field conditions.
Alternatively, if you are in an area where the base maps are poor or only available at a small scale, a GPS reading will probably be more precise than compass triangulation.
An altimeter helps record elevation more precisely than a GPS when mapping or working in steep terrain, for instance, recording a steep stream section.
TIP: Check out the best GPS for rockhounding in the article below:
Best GPS For Rockhounding: 3 Best GPSes You Should Try
Maps and Aerial Photos
Before field trips, geologists print various graphical materials, including topographic maps of different scales, geological maps (if available for the given area), and aerial photographs of the terrain.
Combined with GPS, these tools allow geologists to accurately mark the coordinates of necessary locations and plan work sectors.
Using satellite imagery, geologists can locate necessary outcrops of rocks, required landforms, or other promising areas for geological exploration.
Pocket Stereoscope
This tool creates a three-dimensional (3D) effect while viewing aerial photos or topographic maps. This allows geologists better to understand the three-dimensional structure of geological formations and landscapes.
Other Geological Tools for Fieldwork
This table provides a list of simple field tools with a very brief description. These tools can be easily obtained in a store and are helpful for those who like to go out into the field to hunt minerals and rocks.
| Tool | Main Usage |
|---|---|
| Penknife and Pocket Mohs Scale | Uses to determine the hardness of minerals. |
| Weak hydrochloric acid (c.10%) | Uses to identify carbonate rocks. |
| Scratch/streak plate | Uses to determine the color of mineral features. |
| UV flashlight | The tool allows testing minerals’ luminescence (the effect of light emission) under ultraviolet light. |
| Tape measure and folding ruler | These are handy tools for determining rock layers’ size, thickness, width, distances between them, etc. |
| Gold pan | The traditional tools used to extract minerals from sediment or stream beds. |
| Comparison and identification charts | Geologists use these printed materials to identify or correctly describe certain rock or mineral features. For example, a diagram to estimate the percentage of mineral composition in a rock section, etc. |
TIP: A Mohs hardness test is one of the most valuable tricks that should be in all rockhounds’ playbooks. Check out the best Mohs hardness test kits in the article below:
3 Best Mohs Scale Test Kits: Test Hardness of Your Gemstones
BTW: If you are looking for the best UV light for rockhounding, find out my picks below (Amazon links):
- BEST OPTION: Convoy 8+ 365nm UV LED Flashlight with Patented Glass Filter
- BUDGET OPTION: Karrong Rechargeable 1200 Lumen 395nm UV Flashlight
- OPTION FOR INDOOR USAGE: Prime Upgraded Big Chip 396nm UV
Geophysical Tools
Geophysical tools are used to measure and map various physical properties of the Earth in a specific area, such as local magnetic field, gravitational field, electrical conductivity, seismic waves, etc. Different types of geophysical equipment are used for various purposes. For example:
1. Magnetometers measure Earth’s magnetic field variations, indicating the presence of magnetic minerals or the location of buried metal objects.
2. Gravity meters measure variations in the Earth’s gravitational field, indicating variations in the density of underlying rocks or the presence of mineral deposits.
3. Seismometers measure seismic waves generated by earthquakes or human activity, which can provide information about the structure and properties of the Earth’s crust and mantle.
4. Electrical resistivity meters measure variations in the electrical conductivity of the subsurface, which can provide information about the distribution of minerals and fluids in rocks and soils.
5. Portable XRF is a small-scale variation in the major and minor element concentrations of rocks exposed at the surface
6. Gamma-ray spectrometer is a small-scale spatial variation in the Th, K, and U concentration in rocks exposed at the surface.
7. Magnetic susceptibility meter is a very small-scale spatial variation in the response of rocks to an imposed magnetic field; this relates not only to the composition of rocks containing magnetic minerals but also paramagnetic minerals such as clay minerals.
Geological Tools for Laboratory Research
As mentioned, each geological research field has equipment and tools to solve specific tasks.
Similarly, geological laboratories have different equipment depending on the laboratory’s specialization. We will provide some examples of instruments used in a geochemical laboratory.
The geochemical laboratory determines the chemical and mineral composition, features of texture and structure of rock samples, and so on.
Microscopes
A geochemical laboratory uses different types of microscopes to examine geological samples, depending on the type of sample and the information they want to obtain.
TIP: Creating a collection will turn your ordinary stones into a valuable source of information for other mineral lovers. Find out the complete guide on labeling and organizing rock collection in the article below:
Expert Tips on Labeling & Organizing Your Rock Collection
Optical Microscope
An optical microscope is a versatile instrument to observe geological samples’ texture, mineralogy, and other features. This type of microscope uses visible light to produce an image and can be used for both transmitted and reflected light microscopy.
For example, geologists can use a microscope to study the polished surface of a rock sample in reflected light. Also, it is possible to study the small minerals that have been washed from a water stream, etc.
Petrographic Microscope (or Polarizing Microscope)
A polarizing microscope is an optical microscope equipped with polarizing filters to analyze the optical properties of minerals in thin sections. This type of microscope is used to identify minerals and their crystal structures and to analyze rock textures and deformation.
Scanning Electron Microscope (SEM)
An SEM uses a beam of electrons to produce high-resolution images of geological samples. This type of microscope can provide information on samples’ surface texture, composition, and morphology at much more magnification than optical microscopes.
Spectrometers
There are various types of spectrometers used in the geochemical analysis, including atomic absorption spectrometry (AAS), inductively coupled plasma mass spectrometry (ICP-MS), inductively coupled plasma atomic emission spectrometry (ICP-AES), and X-ray fluorescence (XRF) spectrometry.
These instruments are used to measure the concentration of chemical elements in samples.
Chromatography Instruments
Gas chromatography (GC) and high-performance liquid chromatography (HPLC) separate and identify organic compounds in samples.
In addition to analytical instruments, a geochemical laboratory has many other tools needed to prepare samples for research.
Sample Preparation Equipment
This includes various crushers, mills, pulverizers, muffle furnaces, laboratory balances, etc., used to prepare rock and mineral samples for further studies.
TIP: Modern geological methods of mineral identification are far more complicated than people used to think. Check out these methods in the article below:
Modern Methods of Rock & Mineral Identification (by Expert)
Conclusion
Today, geologists use various tools, from simple traditional ones such as a hammer, compass, and loupe to modern high-tech equipment such as multiple geophysical instruments, GPS, and more.
This allows geologists to locate deposits of various valuable minerals, ranging from solid to hydrocarbons and water.
We recommend using some tools for those involved in prospecting and rockhounding. These tools include:
- Geological hammer and chisel.
- Gemological loupe and pocket magnifying devices.
- Field notebook.
- GPS to mark the sampling location.
- Topographic maps, satellite images, and geological maps of the area.
- Pocket Mohs scale.
- Weak hydrochloric acid (c.10%).
- Scratch (streak plate).
- UV flashlight.
- Gold pan.
- Optical microscope.
These tools will allow you to take your hobby to a high professional level and make it much more enjoyable.
Sources
- Angela L. Coe – GEOLOGICAL FIELD TECHNIQUES
- Frederic H. Lahee – FIELD GEOLOGY
- Cornelius S. Hurlbut – MANUAL OF MINERALOGY
- Michel Demange – MINERALOGY for PETROLOGISTS
- S. K. Haldar, Josip Tisljar – INTRODUCTION TO MINERALOGY AND PETROLOGY
TIP: Mineral and rock identification is essential to rock hunter life. Check out the complete guide on identifying rocks at home in the article below:
Identifying Minerals and Rocks at Home (Step-by-Step Guide)